Welcome to our website !
Hi there PYMUO followers! How is everyone doing today?

Today I will be going over my every day skin care routine. It's super easy. It only has two products and two steps. This is excluding SPF which I highly recommend after you wash your face in the morning! But as we all know, that's beauty care 101 so I don't feel like I should mention it.

The very first product I use is coconut oil. Coconut oil is great for many things such as...

  • cracked and dry lips
  • softening the skin
  • cracked and dry feet
  • skins disorders such as psoriasis, acne, and eczema
  • treating minor infections

It is also an AMAZING make up remover! Even with extremely dark makeup I don't have to stand in front of the mirror for very long because it is SO effective and cheap (it even takes off your hard to remove mascara!!!).

The second product I use is tea tree oil. Tea tree oil has anti-fungal properties and helps with...

  • acne, dark spots, and blemishes
  • fungal and bacterial infections 
  • minor cuts, wounds, warts, ringworm, insect bites, rashes
  • dandruff
  • healing piercings
  • soothing nickel allergies and other allergic reactions
  • cure for dry skin when mixed with a moisturizer

Be careful not to put it around your eye area as it can be a little overwhelming, and never put tea tree oil by itself on your face unless you are tackling a zit or a pimple.


Also, please do not use a lot of coconut oil. Using excessive amounts of coconut oil will make you break out. What I do is gently swipe my finger into the oil, because I found putting too much will suffocate the skin and we don't want excess oil.


STEP ONE

Apply a dime size amount of coconut oil onto the palm of your hand and rub it into your palm. Rub your hands for one second under warm water, then apply to the face. I like to take my time getting every area of my skin, and even my neck. When you put the coconut oil on it will feel like a slippery film is on your face. This is normal.

STEP TWO

Now rinse your face with warm water. I don't rinse as much as I would with a cleanser, as I want some coconut oil to remain on my face.
Pat your face dry. Put one drop of tea tree oil on your palm and rub together. Pat on the face.

And you are done! That is my skin care routine.
After only a week I noticed a huge difference in the way my face looks after using coconut and tea tree oil. These are the things that I notice most:

  • super soft skin
  • redness in the cheeks are gone
  • no breakouts 
  • i look less tired
  • acne scars slowly fading away
  • skin lightening
Play around with the amount of oils needed for your face. Each and every one of us has different skin. I highly recommend this skin care regime, and you can use it on your back, or anywhere else on your body if you have acne! You can also leave out the tea tree oil and just use coconut oil to moisturize your hands, elbows, feet and even really dry hair. Don't be afraid to experiment with coconut oil!
Hello everyone! Today I am doing a [long over due] post on The Wet Brush.
Here's some facts about The Wet Brush:


  • The Wet Brush has Intelliflex bristles, which are thinner than your normal hair brush
  • The Intelliflex bristles are very flexible, running through the strands of your hair instead of pulling it
  • The Wet Brush has ultra soft tips that will never come off
  • Works on wet and dry hair
  • For almost all hair types
  • Ideal for sensitive scalp and long hair
  • Also great for wigs and weaves!
  • There is also the Shine, Hot, and Blo Brush available

REVIEW

So I'm not really big into fads, and most of the time I just ignore what's popular at the moment. Until I needed a new hairbrush. Because my old one was pretty ratty looking, and it was for kids! 


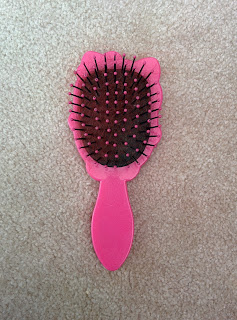
I mean come on, it's Hello Kitty. Who wouldn't want to brush their hair with Hello Kitty!?

Anyway, the glue was wearing out, Hello Kitty started to look like her insides were being disembowelled - it was time for a new brush. It wasn't the greatest of brushes. I think it took about 30-40 seconds to untangle my long hair, or until I was fed up with brushing it.

After reading Allie's review on The Ultimate Detangling Brush, I had to ask if it actually worked. Allie wasn't there to reply, but Amy was, and she suggested The Wet Brush. With all the wonderful reviews it got, I got one the next day.

Shipping took a day because I got it shipped from Vancouver. Yes, I'm that lazy. But when you live in a city as big as Vancouver, driving or taking transit for a hair brush seems too out of the way. In total I paid $20, with $3 shipping.


Looks pretty normal, right?

The brush has a soft yet grippy texture. I got black because I couldn't decide on a colour, and didn't want to pay extra for all the cool designs that they had. 


This was my hair before. I had just got back from an interview. (which I  got the job for... hurrah!)
 I had been out for about two hours. Looks messy and frizzy.

Honestly, I didn't think this would work.


But it did!

And let me tell you, I'm pleased with it. It took me under 10 seconds to brush my hair. That's 70% less time than brushing with Hello Kitty. It literally went straight through my hair.

It looks like a lot that came out on the brush, but it wasn't. Since my hair is so long, some does come out naturally. I actually picked each individual strand out counting it, and the majority of them were split ends. I haven't cut my hair since December... so obviously it'll look like less than what I have.


OMG! The Wet Brush definitely has my seal of approval!
(Yes, that was my face when I tried it out for the first time)


UPDATE: After spending some time with the wet brush, I still consider this brush a lot more gentler on my hair... at times. If I tease my hair, or if it gets windy and my hair gets tangled, the wet brush CANNOT take out the little knots in my hair and actually hurts my scalp! So I have to use my wide tooth comb. My hair still combs out in the wet brush like any ordinary brush, but again I have pretty long thick hair. I probably wouldn't buy it again, and stick with a bristle brush and my wide-tooth comb! This brush is best suited for people with shorter hair than I, or someone who has straight hair (I'm naturally curly).
Hello all! Just updating quickly that I had my very first pole performance on Saturday July 18th! I'm so excited to share with you guys!

This was a fundraiser for Jose, one of AVA Fitness' students, to go to nationals in August of this year. The fundraiser was at Status Nightclub in New Westminster. When I first walked in the club, it was so small! Even the stage area.. it was really hard to dance on. I think I would've done a better job if the stage and ceiling was a little higher. You can see in the video my foot actually hits the bar on the ceiling, making me lose my balance and I fall! lol.

Honestly I never thought I'd be performing three years ago, but here I am now! I was so full of emotions, it was really overwhelming the amount of support I got over the weekend.

The process of coming up with a routine was a difficult one, as I didn't have any help with it. Although I wanted to do a private session with my instructor, I just didn't have the time or money to do it so I had to think up something for myself. Let me tell you, it's harder than it looks. I think I switched songs three times!

I eventually picked If I Had A Heart by Fever Ray. I wanted something slow enough that I could take my time with, along with something I could play in a club setting. I think it went well, but next time I'll pick a more upbeat song.


The whole experience was surreal. Being up on that stage gave me so much confidence. I cannot wait to get back into the studio and work even harder. After the summer is over I'm going to train for regionals, and hopefully I'll be going to nationals also!


If anyone is wondering, my pole outfit is a bathing suit lol! Bottoms are from Forever21, top is from Garage Clothing, and I just added flowers and glitter from Dollarama!
Today I'll be doing a quick review on a small little cafe called Cafe Joie located in South Burnaby. My boyfriend found this place while browsing Instagram and they have the most delicious looking waffles I have ever seen! So we decided to go sometime this week and let me tell you the experience was 100 times better than the website.

Cafe Joie is not too far from the Metrotown SkyTrain station. I believe if you walk through Metropolis it's only a 10 minute walk. The cafe is located just off of Kingsway and Sussex. When you first walk in it has a very modern feel to it. The walls are painted an off white I believe, and they have unique lighting. Lots of little touches to the restaurant. I didn't take any pictures of it but there's plenty on the website that you can view.

It was so hard to choose what to eat. I decided to get the green tea waffles and my boyfriend got a roast beef panini and an iced coffee. We shared the rainbow cake.
The iced coffee was good. The coffee wasn't strong and it wasn't watered down, which I find is common with independent coffee shops like this. It had just the right amount of flavour with it not being too bitter or too sweet. I'm not a coffee drinker and I even liked it, so I would order myself one.

Next was the roast beef panini. Not sure what was in it as I didn't order it or what kind of salad it was ahah, but was it ever DELICIOUS!!! The bread was crisp, the meat and cheese was toasty warm so the cheese just melted in your mouth. I didn't get the chance to try the salad but the dressing was really good. I would definitely get this again, it was amazing!


The waffle was the most amazing waffle I have ever seen. I am a very big breakfast eater, so pancakes and waffles are my absolute favourite way to start the day. The waffle looks bigger than it does on the plate. It had a green tea and vanilla macroon on top (which was OMG AMAZING!), green tea ice cream, whipped cream, kiwi, strawberries, almonds, drizzled with green tea sauce, powdered with sugar and matcha. It was seriously the best thing ever. The waffle was so warm, that pairing it with the ice cream was absolutely the best thing that they have done. It was filling too! I would've ordered another one but I was pretty full after that one, plus I still had cake to devour. I highly recommend getting the green tea waffle!!!!


The rainbow cake was visually appealing, but wasn't much. The lemon frosting was delicious. I felt like it needed something else, some kind of other flavour to make it really POP but I'm not sure what it is.
Other than that, it has the visual wow factor but the taste was okay. Would have again though.


Pros
  • Visually pleasing dishes
  • Delicious - nothing was tasteless or bland
  • Variety of selections to choose from even though the menu itself is quite small
  • Does not need syrup to make these waffles amazing (which I'm into lately because we haven't had maple syrup in the house lately)
  • Lots of desserts including cake in a jar, macroons, cakes, waffles, ice cream... I believe some other things
  • Close to the mall
  • Great atmosphere
Cons
  • When you walk in, the menu is quite small. I have glasses and even I had a hard time reading it
  • A little expensive. I think this was almost around $30.00 for the both of us, which isn't bad but this is a cafe. My waffle alone was $10.00. They just opened up though, so maybe their prices will go down eventually.
  • Their website is horrible. They have a link to their 'menu' but it's just pictures and not even half of what they have in the cafe itself. No prices on it either. You just have to go in and trust that you're going to have a great experience (and you will).
Overall, my experience blew me out of the water. Definitely a place to check out if you're ever in the Metrotown area.

9/10 would come again.
Hello PYMUO followers! Today will not be a beauty review but a recipe on the infamous banana and egg pancakes. They're fairly simple to make, and I added in a few extra ingredients.


 Ingredients:

1 Ripe Banana
2 Large Eggs
1 Scoop of Chocolate Protein Powder
1 Teaspoon Baking Powder
1 Teaspoon Vanilla Extract
3 Teaspoon Olive Oil


Instructions


  • Chop up one rip banana.
  • Add in the two eggs and mush it all together!
  • Add in the baking powder and vanilla extract. Mix it together.
  • Mix in one scoop of your favourite chocolate protein powder. You can also substitute or add any other flavours. Sometimes I use fresh blueberries or chocolate chips, and sometimes cinnamon or nutmeg.
  • Add the three teaspoons of olive oil in the pan. Heat the pan just below medium heat.
  • After a couple of minutes, scoop out three tablespoons of your pancake mix on the pan. Each pancake is three tablespoons.
  • Let sit for one to two minutes. Be gentle with these pancakes as they can fall apart easily. 
  • Once the pancakes move around quit easily, flip them! Let the other side cook for another minute.
  • The bottom two pancakes is what they should look like just put on the pan, and the top three is what it should look like cooked. They may turn out darker depending on the type of protein powder you use!


And that's it! These are fairly thin pancakes as you can see on the left picture.
These pancakes are VERY sweet, I didn't really need to put maple syrup on them! I use either honey or 100% maple syrup, and for a substitute for whipped cream I use vanilla greek yogurt (not shown).

I really hope you guys enjoy these. They're really easy to make and you can't really go wrong with them.


 Hey guys! Today I'll be reviewing the Zombie BB Cream by Welcos!


I've heard great things about this product. Allie did a review on it a while back on the CC Cream, but I was unable to find the CC cream, so I had to settle with BB.
Before I purchased this, I was kind of concerned about how big the bottle would be. Usually when I order from RoseRoseShop, most things come smaller because it's more of a sample site. But when I received my products, all were full sized! As you can see, the box fits nicely in the palm of my hand.


This is the bottle itself. It's actually fairly large, and surprisingly you only need a pea sized amount. I'll get to more on the cream later, but lets talk about what the BB cream does.

Zombie BB Cream comes with an SPF of 50 with added PA. Not only does this BB cream combat UVA rays from the sun, but also harmful UVB rays. It is recommended that you reapply every two hours.

Zombie BB Cream also 'whitens' your skin. I say that loosely because all it does is make your skin look lighter, or in my case more porcelain.

It combats wrinkles also, and I really believe it does that because the formula is fairly thick.


This is the formula on my hand. It pretty much looks like any other type of BB cream, but mix it onto your skin it not only blends with your skin tone, but also whitens it. I really like this feature because it covers all of my imperfections including my acne scars that I have on my face. Although they are faint, I still am slightly conscious about it.

The BB cream also has a really nice smell. People who are looking for hypoallergenic creams will not like this one because it has perfume in it, and it clearly smells like it. But that's the reason why I love applying it, because my face smells amazing! It's not too overpowering either.

Also, I recommend using a foundation and concealer brush to apply to your face, as you'll end up using more if you use your fingers. Because this formula is so thick, I kept having to reapply more of the BB cream while using my hands. Not sure why this is, as it's usually the opposite.

Here you can see the difference it makes. On  the left side of my face is the BB cream, and the right side is my natural face. As you can see, I'm fairly red around the eyes and I look tired! With the BB cream you barely notice this, but it still achieves a nice natural look. It looks well with any light too, as I've worn this out on special occasions.


Before, During, & After

Overall I love Welcos' Zombie BB Cream. The only part I don't like about it is it's only exclusive to white skin. I applied to my boyfriend and it just did not work! It's probably because of the whitening properties in the cream, and because this is from South Korea that there isn't much demand for darker foundation. Many South Koreans practice skin care, ranging from anti-aging products to UVB and UVA protection from the sun. 

Oh, I also forgot to mention that this is the perfect BB cream to get sweaty in. I've worn this to pole multiple times, and on hot days and while my face sweats it barely comes off. I wear glasses too, and every time I sweat my BB creams melt off which I hate because I constantly have to reapply! Just remember to wash your face afterwards as it could potentially clog your pores. You shouldn't be wearing make up working out but if you do, make sure to give your skin a nice cleanse afterwards.

10/10 would highly recommend!!!

I recently ran out of day & night cream and decided to order some stuff from Rose Rose Shop because I haven't since August! For those of you who are new to the blog, Rose Rose Shop is a discounted Korean beauty product online store. Allie & I first discovered Rose Rose while googling cheap asian beauty products because we wanted to try something new and we both love Asian culture. We placed our first orders and we were nothing but happy about it, so we decided this was one of our go-to shops to buy from.

That being said, today I will be reviewing a product from my recent order: the Mise En Scene Hello!! Bubble Foam Colour in Raspberry Red.


I was a little skeptical ordering hair dye from another country because... well... it's from another country! I had read reviews online and they all said that it was a great product and that they would buy again. But with the examples given, many of the people had very dark brown or black hair and when they used the hair dye it gave them a hint of red to it. I had no idea how my hair colour was going to turn out!! So I bit the bullet and got it.

The reason why I got it was the foam hair dye. My boyfriend actually dyes my hair himself (he's such a pro for only doing it three times) so I wanted something a bit easier for him to apply to my long hair. Dying my hair usually takes about two long gruelling hours.

The contents of the box came with two white packets and a bottle with a nozzle, gloves, conditioner, and even a plastic cape!

The application was fairly easy. You pump the dye straight into your hand and apply. I got a nice scalp massage and applying it only took 45 minutes! The hair dye did not have a strong chemical smell. It smelled absolutely amazing! Like a coconutty perfumey smell. The only thing I didn't like was that it made my head itch a bit, while other reviews said that it didn't.

When you first apply the product, it doesn't show up on your hair right away. After a few minutes though, my hair looked extremely dark. Nothing like the colour - almost black. I was a bit afraid that I got a colour that was too dark for my liking, because this product is made in Korea and Koreans have naturally black hair.

For the instructions, they were fairly easy. I understand and can read a bit of Korean so that helped me differentiate between what packets were what, but by looking at the pictures a foreigner could completely understand. The instructions were very fun to look at also.

I wasn't sure about the time I should leave it on, so I left it in for about 45 minutes. Rinsing it out was a bit of work because there was a LOT of hair dye (I like to used the entire bottle in one sitting). The hair dye while rinsing out was really dark and almost looked like oxidized blood. But after a while it slowly let up, and I got to use the conditioner. The conditioner was a really bright orange which was surprising! I can't exactly remember the smell of it but I remember thinking "Well this isn't a smell I have smelled before..." so I'm not really sure if I like it or not? Ahah.

I left my hair to dry naturally and went to bed. When I woke up, I looked in the mirror and I was completely surprised!


My hair was SO red! It is easily one of the most vibrant colours I have ever used on my hair, besides the hot pink I once had. My hair was super soft, smelled so good. I was pleasantly surprised how much the colour took. But would it pass the shower test?

Red hair dye is known to fade quite quickly. Anybody who dyes their hair red knows that a lot of colour comes out while washing your hair, and to keep the water cool or lukewarm. Surprisingly, this hair colour does not come out a lot. I can barely see the dye in the water when I'm showering! I was really happy with that, and even continuously rinsing my hair after sweaty work outs, it barely fades. I am so happy with this product, Mise En Scene has a new customer!

You can probably tell I will buy this product again. I would rate it 9/10, just because my head got a little itchy during the application. Other than that, I highly recommend this product for people who want a vibrant red colour, who have really long hair, and want a easy go-to product when they don't have a lot of time. 

For those of us who don't have the luxury of having their own pole at home, or want some toned abdominals and arms, I created a pole-inspired work out to target those abs.

Keep in mind that these moves are fairly advanced as I got my boyfriend to try them out.

So here is what we did! Remember to put in cardio during or after your work out. After each set I like to either jog, do high knees, or mountain climbers for 60 seconds so it'll add up to 20-30 minutes of cardio. You can train your body to do amazing stuff, but without cardio you will never see those results and lose the weight.


Hanging Pike Leg Lifts - 3 Sets 10 Reps


  • Make sure your back is flat - no rounding
  • Keep your feet together and legs straight as best as you can
  • Lift up with your quads - not your back!
  • Try and keep your feet off the floor
  • Do NOT pull up while doing pike ups - leave your arms hanging
  • If a bar is not available, you can also do these on the floor


Hanging Straddle V Leg Lifts - 3 Sets 10 Reps


  • Same with Hanging Pike Ups, but your legs are in the shape of a "V"
  • If you can, try to keep your toes pointed. This makes it harder.
  • If a bar is not available, you can also do these on the floor


Pull Ups - 3 Sets 5 Reps


  • It's okay to jump into a pull up position
  • Only go as far as you can go down
  • Don't extend your arms all the way down if you can't pull back up
  • Little pulses are okay
  • Keep your body aligned - no curving of the back or bend knees


Push Ups - 3 Sets 10 Reps


  • Make sure that your arms are directly beneath your shoulders, hands shoulder width apart
  • When you lower down, tighten your core, quads, and hamstrings.
  • When you're in the down phase of the push up position, squeeze your shoulder blades together
  • Look in front of you
  • REMEMBER TO KEEP YOUR BACK FLAT! Your body should always be straight in a push up or plank. 


Hearts - 3 Sets 10 Reps


  • Laying down, hands under your head and feet together
  • Lift both legs up as far as you can go without lifting your hips off the ground
  • Open up into a straddle and come back down so your legs end up back together, drawing a heart
  • Make sure that your back is flat against the ground. If you have a problem with this, place your hands under your butt


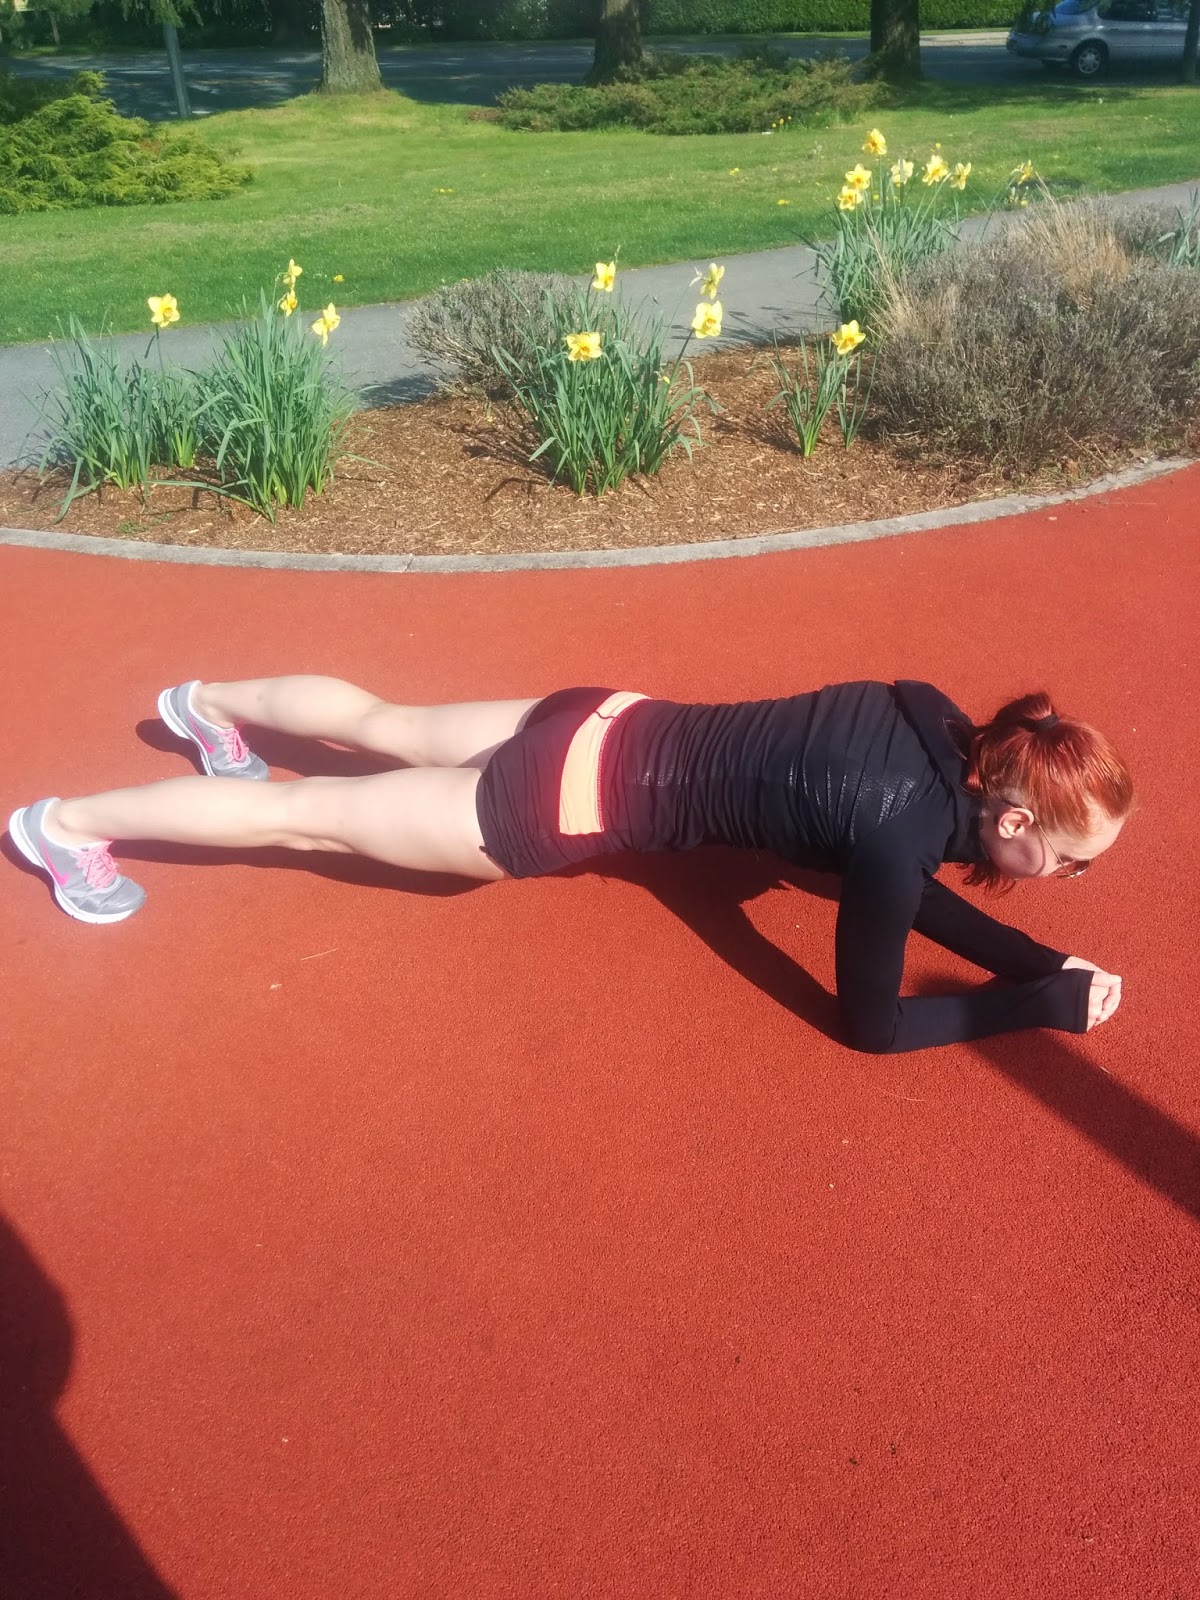
60 Second Plank


Advanced vs Beginner

  • Same as a push up, but holding one position for 60 seconds
  • Try to squeeze every muscle in your body. This move is good for glutes and abdominals


Pause Goblet Squats - 3 Sets 10 Reps


  • Standing up with feet hip width apart, squat down until you can't go any lower. You're going to want to actually sit in the squat
  • Remember to keep your back as straight as possible. No rounding of the back
  • Pause for 3 seconds
  • When you come back up, put your weight in your heels. Squeeze your glutes as hard as you can coming back up
  • You have the option to do this with weights if you want a harder workout

And that's it! Have fun and feel the burn!


Powered by Blogger.